Quick Azure Cost Management - Budget and Notifications with Bicep and alternatives

Managing costs in the cloud is crucial to avoid unexpected expenses.
How many times have I read "Azure just charged me 1k dollars because of a misconfiguration".
Did it happen to you as well? Me too. And I know how stupid you feel after that.
Sometimes it is not even our fault. (cough* strange defaults from Azure *cough)
So to avoid that, we can setup budgets and get notified when we reach certain thresholds.
It's important to know which scope you want to set the budget on. It can be at management group level, subscription level or resource group level.
Choose the scope you are responsible for and want to monitor costs for.
What are the options? Let's explore them.
Using Bicep
You can create a simple Bicep template to create a budget at subscription level with email notification. Here is a sample Bicep code:
targetScope = 'subscription'

@description('Name of the budget')
param budgetName string = 'MonthlyBudget'

@description('Monthly budget amount')
param amount int

@description('Email recipients for alerts')
param emailRecipients array

@description('Start date for the budget (YYYY-MM-DD)')
param startDate string = '${utcNow('yyyy-MM')}-01'

resource subscriptionBudget 'Microsoft.Consumption/budgets@2023-05-01' = {
  name: budgetName
  properties: {
    amount: amount
    category: 'Cost'
    timeGrain: 'Monthly'
    timePeriod: {
      startDate: startDate
    }
    notifications: {
      Forecasted_GreaterThan_90_Percent: {
        enabled: true
        operator: 'GreaterThan'
        threshold: 80
        contactEmails: emailRecipients
        thresholdType: 'Forecasted'
      }
      Actual_GreaterThan_80_Percent: {
        enabled: true
        operator: 'GreaterThan'
        threshold: 80
        contactEmails: emailRecipients
        thresholdType: 'Actual'
      }
      Actual_GreaterThan_100_Percent: {
        enabled: true
        operator: 'GreaterThan'
        threshold: 100
        contactEmails: emailRecipients
        thresholdType: 'Actual'
      }
    }
  }
}
This bicep template creates a monthly budget with specified amount and email notifications when the actual or forecasted costs exceed 80% and 100% of the budget. You will be notified via email to the specified recipients until end of date (because no end date is specified, it will run for 10 years after last deployment).
You can deploy this Bicep template using the Azure CLI with the following command:
az deployment sub create -l switzerlandnorth -f budget.bicep -p amount=100 emailRecipients="['YOUR-EMAIL@ADDRESS.COM']"
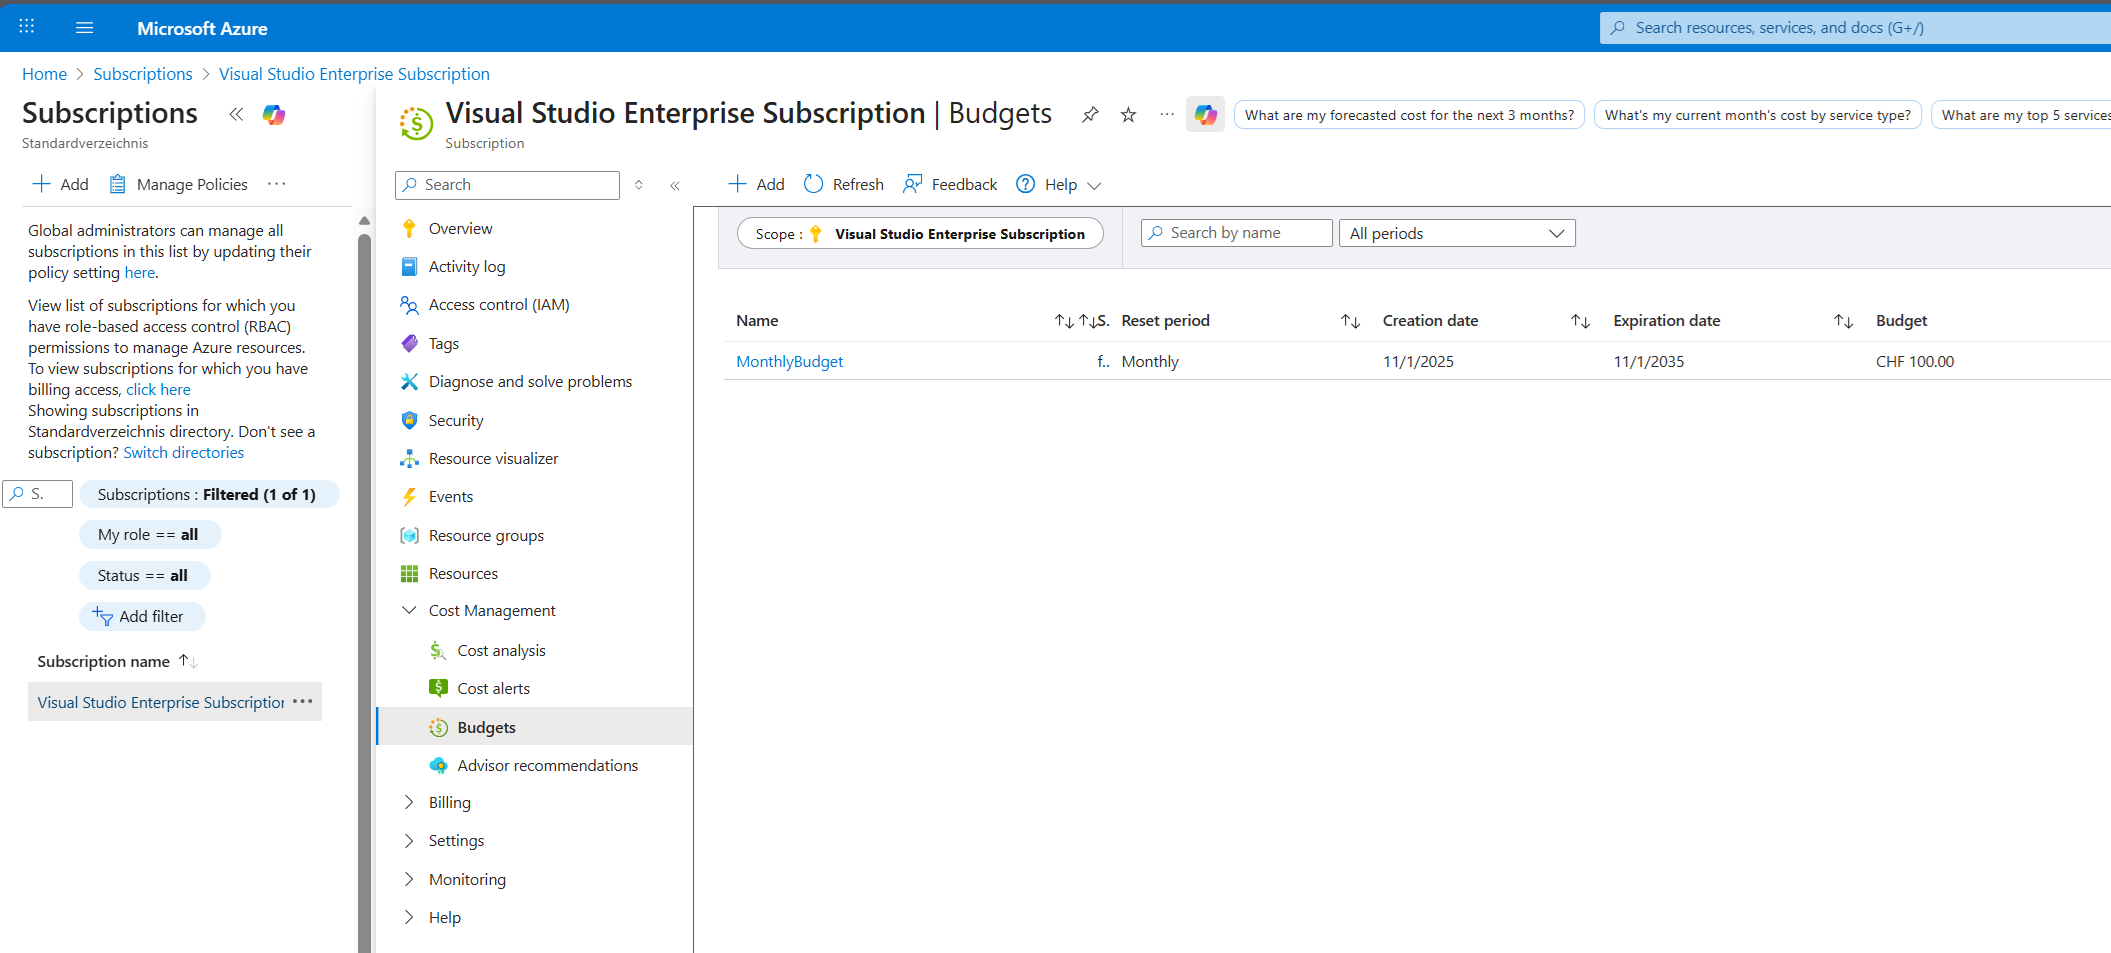
After successful deployment, you should see the budget in the Azure portal like this:
Using AZ CLI
Alternatively, you can create a budget using the Azure CLI. Here is an example command:
# Sign into Azure CLI with your account
az login

# Select a subscription to monitor with a budget
az account set --subscription "Your Subscription"

# Create an action group email receiver and corresponding action group
email1=$(az monitor action-group receiver email create --email-address test@test.com --name EmailReceiver1 --resource-group YourResourceGroup --query id -o tsv)
ActionGroupId=$(az monitor action-group create --resource-group YourResourceGroup --name TestAG --short-name TestAG --receiver $email1 --query id -o tsv)

# Create a monthly budget that sends an email and triggers an Action Group to send a second email.
# Make sure the StartDate for your monthly budget is set to the first day of the current month.
# Note that Action Groups can also be used to trigger automation such as Azure Functions or Webhooks.

az consumption budget create-with-rg --amount 100 --budget-name TestCLIBudget -g $rg --category Cost --time-grain Monthly --time-period '{"start-date":"2024-06-01","end-date":"2025-12-31"}' --notifications "{\"Key1\":{\"enabled\":\"true\", \"operator\":\"GreaterThanOrEqualTo\", \"contact-emails\":[],  \"threshold\":80.0, \"contact-groups\":[\"$ActionGroupId\"]}}"
But be careful: it's in preview and might change in the future. Another challenge with this approach is readability and maintainability of the code.
Using Azure Portal
You can also create a budget directly from the Azure Portal. Follow these steps:
- Navigate to Subscription or Resource group depending on your responsibility.
- Click on "Budgets" under the "Cost Management" section.
- Click on "+ Add" to create a new budget.
- Enter the budget details such as name, amount, time period.
- Set alerts by setting first condition to 80% and second to 100% with email notifications.
- Add all email addresses that should receive the notifications.
- Hit "Create" to finalize the budget setup.
Conclusion
I highly recommend setting up budgets for your Azure resources to avoid unexpected costs.
This should be done as early as possible in your cloud journey.
It's one of the best practices in the Azure Well-Architected Framework under Cost Management pillar.
By applying budgets, you can monitor and control your cloud spending effectively and achieve the fullfil the following design principle:
"Continuously right-size investment as your workload evolves with the ecosystem."
Using Bicep makes it easy to automate the setup and ensures consistency across your environments.
Another benefit for using Bicep is readability and maintainability of your infrastructure as code.
Other benefits of IaC include version control, collaboration, and repeatability. But that is a topic for another blog post.
You can customize the budget amount and notification thresholds as per your requirements.
Go always for the automated way if possible!
PS: If you still get surprised by unexpected costs, consider contacting Azure Support for a refund. They are usually quite helpful in such cases.
Happy budgeting!