
Infastructure as Code (IaC) - Your First Steps with IaC in Azure

In the cloud world, it’s all about speed, repeatability, and stability. That’s where Infrastructure as Code (IaC) comes in. Many imagine YAML files or PowerShell scripts, but the truth is: Anyone can start with IaC today.
In this post, you’ll learn:
- What IaC is and why it matters
- How to get started in Azure – even without deep experience
What is Infrastructure as Code (IaC) and why it matters?
Infrastructure as Code (IaC) is the practice of defining your cloud infrastructure - servers, networks, databases, and entire environments - as code.
Instead of manually configuring resources in the Azure Portal (“ClickOps”), you describe your infrastructure in code that can be automatically deployed, versioned, and reused.
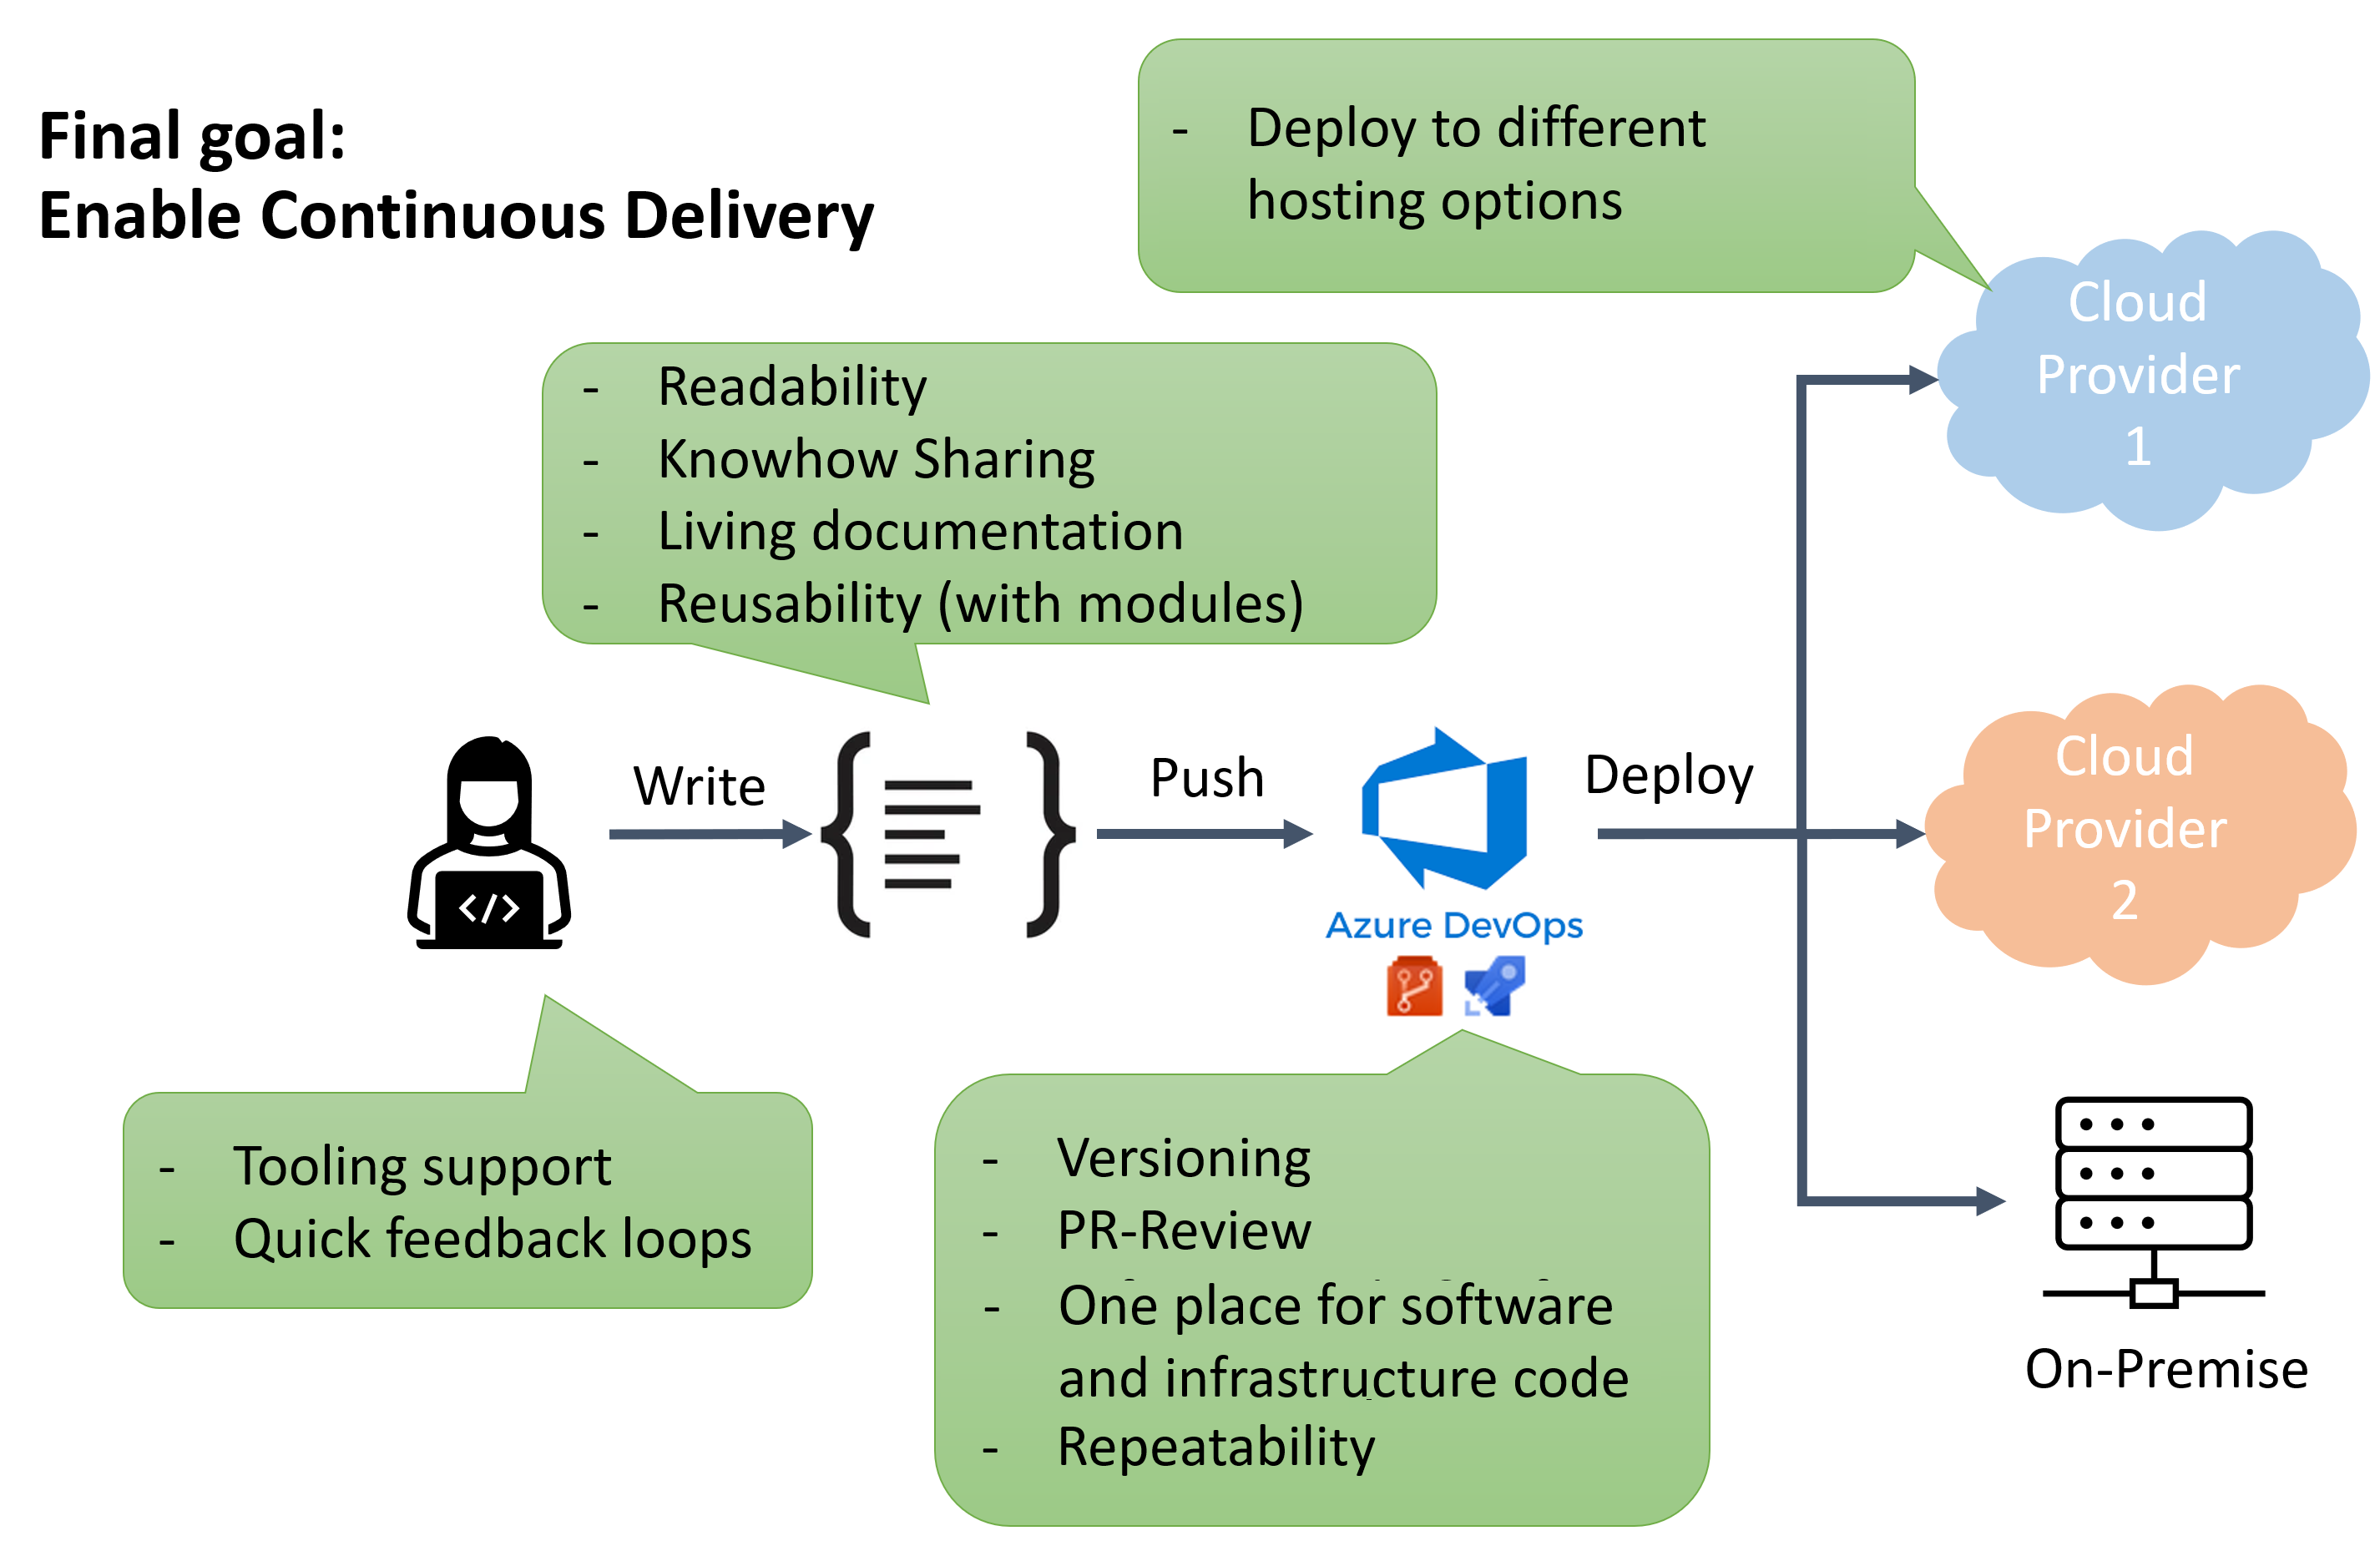
Key benefits of IaC
- Tooling support: IDEs provide rich support for developing IaC, including linters, code automation, and type safety.
- Quick feedback loops: Shift left to detect errors and issues as early as possible.
- Readability: Code is easy to read, understand, and extend.
- Knowledge sharing: Teams can collaborate and share infrastructure expertise.
- Living documentation: The code itself documents the infrastructure and provides feedback if something is outdated or incorrect.
- Reusability: Use modules and templates just like you would in your software code.
- Versioning: Track changes and maintain history, similar to software code.
- PR review: Infrastructure changes can be reviewed before merging into the main branch and deploying.
- Unified codebase for software & infrastructure: Keeping software and infrastructure code together shows the relationship between feature changes and infrastructure updates.
- Repeatability: Define once, deploy anywhere. Deploy the same to different environment multiple times consistently. IaC should be idempotent, so rerunning it produces the same result without errors (e.g. Deployment failed because resource already exists).
- Deploy to multiple environments and platforms: e.g., Azure, AWS, on-premises, etc.
Azure: How to get started easily
Azure provides many ways to start IaC without friction. Here are the key starting points
1. From ClickOps to IaC via export
If you’ve been creating resources in the Azure Portal, you can generate IaC directly:
Via Azure Portal
- Go to Azure portal
- Select your resource group
- Under Automation -> Export template
- Select output type you like (ARM, Bicep, Terraform)
- Review and refactor output
- Redeploy with What-If (Bicep) or plan (Terraform) to see what would change with your updates
Via Az CLI (Bicep)
- Install Az CLI
- Run following code to export and demcompile ARM Template to bicep:
az group export --name "<YOUR RESOURCE GROU NAME>" > main.json
az bicep decompile --file main.json
- Review and refactor output
- Redeploy with What-If (Bicep) or plan (Terraform) to see what would change with your updates
Via VS Code (Bicep)
- Install VS Code
- Install VS Code Extension: Bicep
- Hit Ctrl + Shift + P (Win) or CMD + Shift + P (Mac)
- Enter and select "Bicep: Insert Resource..."
- Enter resource id of single resource. You can retrieve it by looking it up in Azure Portal or with following script
az resource list
- Review and refactor output
- Redeploy with What-If (Bicep) or plan (Terraform) to see what would change with your updates
You can read more about this approach here
Warnings and errors after decompilation (Bicep)
You maybe will get some errors and warnings:
WARNING: Decompilation is a best-effort process, as there is no guaranteed mapping from ARM JSON to Bicep Template or Bicep Parameters.
You may need to fix warnings and errors in the generated bicep/bicepparam file(s), or decompilation may fail entirely if an accurate conversion is not possible.
This indicates where you should focus your attention during review and refactoring. For more information about error codes have a look here
The export feature supports up to 200 resources and may not fully reproduce all configurations. It’s a great learning tool, but not always suitable for production-ready templates.
2. Use built-in templates in Visual Studio Code (Bicep)
Maybe you want to try it on your own and start from zero. Azure comes with many ready-made templates:
- Azure Quickstart Templates with over 500 examples
- Available Bicep resource references Here you have definition of the resources and example usages which can help. (e.g. Key Vault)
- Built-in templates in VS Code (Bicep extension installed)
You can take these templates and tweak them step by step.
3. Use AVM to be aligned to well architected framework
Another way to setup your resources is to use Azure verified modules (AVM). AVM use modularity of IaC and provides standardized building-blocks which are designed with defaults aligned to Well Architected Framework (WAF) and simplifies the setup of your infrastructure. Aligned to WAF means you are respecting the 5 pillars security, performance efficiency, cost optimization, reliability and operational excellence, which are important for building production grade solution.
AVM can be used for Bicep and Terraform. You can read more about AVM here.
You can use AVM by:
- Install VS Code
- Install VS Code Extension: Bicep
- Create bicep file (e.g. main.bicep)
- Define targetScope (e.g. subscription or resourceGroup)
- Enter
moduleand select the module you want. If you don't know what is available check module index page - Fill required fields
For more information about this example see here
4. AI is your friend
AI is another option, although I haven’t had the best experience with it so far. In my case, it often generated code that didn’t compile and needed a lot of improvements, which was more annoying than helpful.
However, based on this post from John Lokerse, it seems to be a valid and promising approach.
I’ll give it another try and see how it works out for me.
Final notes
Which approach you take depends on your experience level and it’s not an either-or decision. You can combine different approaches as you go.
Infrastructure as Code isn’t magic, and it’s not just for DevOps experts.
With the right tools and templates, you can start today and automate your cloud step by step.
Call to action
- Log in to the Azure Portal
- Create a small resource (e.g., a Web App)
- Export the template (Bicep or Terraform)
- Open it in VS Code
- Tweak it slightly and redeploy with preview
Welcome to the world of IaC. You’ll never want to go back.
References
Update 22.10.2025
- Add AI option found from John Lokerse